Guides
How to Make Soap: A Beginner's Cold Process Soap Recipe
By The Soap Brain Team — Cold-process soap makers & formulators
·
If you can follow a recipe and read a scale, you can make cold process soap in your own kitchen. The lye is the one part that deserves real respect, and that respect is mostly setup: the right gear, a clear counter and no distractions. The rest is weighing, stirring and waiting.
The Short Version
Here's the whole job in the order it happens:
- Suit up and set out your gear.
- Weigh your oils, then weigh the water and lye separately.
- Stir the lye into the water, then set it aside to cool.
- Melt the oils.
- When both are around 100-110°F, pour the lye solution into the oils and blend in short bursts to trace.
- Stir in fragrance if you're using it, pour into the mold and insulate.
- Unmold and cut after 24-48 hours, then cure the bars for 4-6 weeks.
The hands-on part takes an afternoon, and most of that is cleanup and waiting for things to cool. The loaf sits in the mold for a day or two, and the bars then sit on a rack for a month or more. The waiting is the longest step, and it's the one everyone wants to skip.
What Cold Process Soap Is
When you combine oils with a lye solution (lye dissolved in water), the two react and turn into soap and glycerin. The reaction makes its own heat, so you never cook the batch on a stove. That's the "cold" in cold process. It's also why the bars are real soap made from scratch, not melted-down base, and why they keep their natural glycerin.
If you're still deciding between this and melt and pour, hot process or liquid soap, the Types of Soap Making article lays out the differences. This guide assumes you've picked cold process and want to get on with it.
Equipment You'll Need
Everything below becomes soap-only gear. Lye and soap batter leave residue you don't want in your dinner, and lye can damage some materials. Label the tools, keep them in their own bin, and don't put them back in rotation for food.
- A scale that reads in grams. This is the most important tool you'll buy. If your budget is tight, buy the scale first and improvise the rest.
- A stick (immersion) blender. More on why below.
- A lye container made of HDPE #2 plastic, PP #5 plastic or stainless steel. It needs to be sturdy, because the solution gets hot. Never use aluminum, which reacts with lye.
- A second container for melting the oils. Stainless steel or a heat-safe plastic pitcher both work.
- A thermometer. An infrared or a probe style is fine.
- Silicone spatulas. They're easy to scrape clean and they don't degrade.
- A mold. A silicone loaf mold is the easiest for a first batch, or use a sturdy box lined with freezer paper.
- Safety gear: see the next section.
Lye Safety
Here are the essentials, stated once. Do all of this before you open the lye.
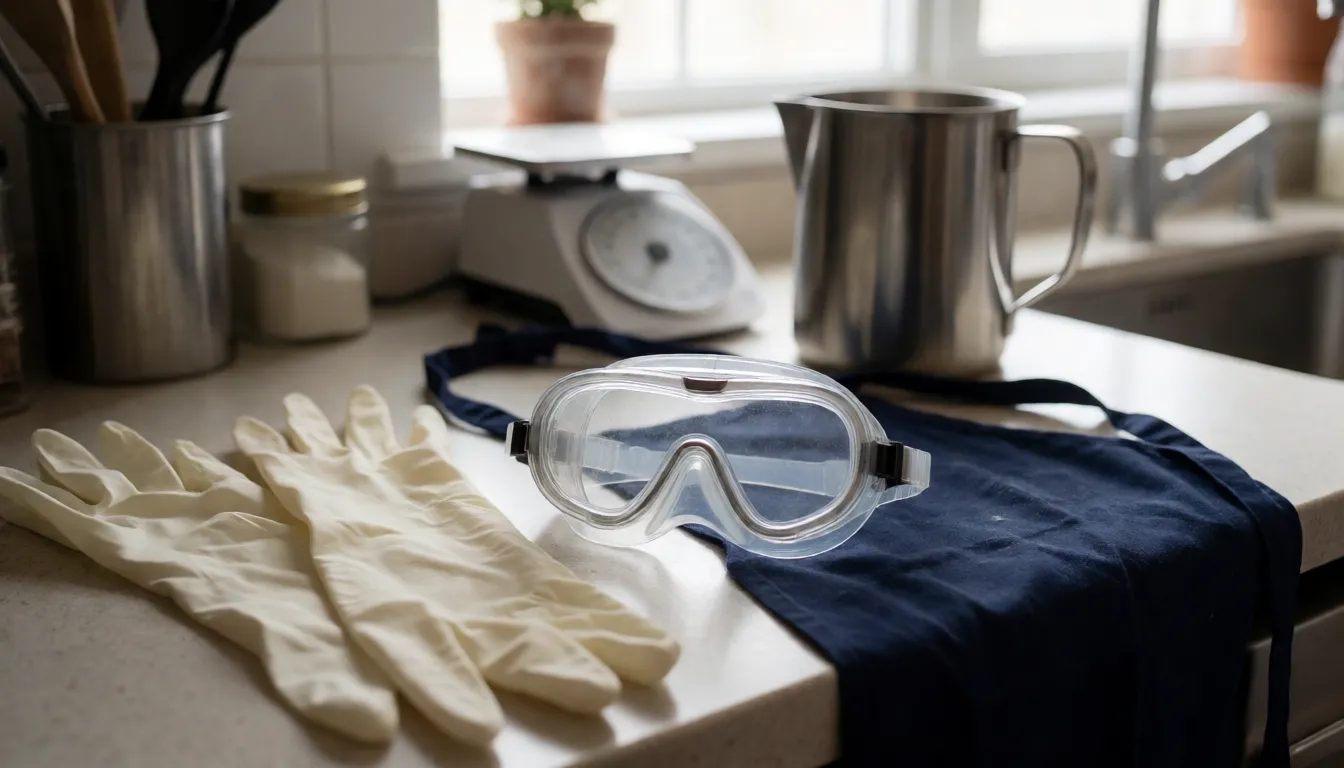
- Wear splash goggles (regular glasses aren't enough), gloves that cover your wrists, long sleeves, closed shoes and an apron.
- Work with a window open or a fan pulling air away from you, and keep children and pets out of the room.
- Always add lye to water, never water to lye. The solution heats up very fast, so use a sturdy container and stir gently.
- If lye splashes on your skin, rinse with plenty of running water for at least 15 minutes. If it gets in an eye, flush it with water and get medical help.
For the full checklist, see the shared lye safety list in the Types of Soap Making article.
A First Recipe: 1,000 g of Oils
This is a simple three-oil bar. It's gentle, makes a good lather and is very forgiving.
| Oil | Weight | Percentage |
|---|---|---|
| Olive oil | 500 g | 50% |
| Coconut oil | 300 g | 30% |
| Shea butter | 200 g | 20% |
Run it through the calculator. Open the Soap Brain lye calculator, enter those three oils and their weights, and let it work out the lye and water. I set a 5% superfat and a 30% lye concentration, or the equivalent water discount if your calculator uses that instead. Superfat means a little of the oil is left unsoaped, which keeps the bar mild. Write down the weights the calculator gives you and use those exact numbers on batch day. If you want to know what each oil does, the soap making oils guide covers them.
Fragrance is optional. If you want it, follow the rate your supplier recommends for that specific oil, because safe amounts differ from one fragrance or essential oil to the next. The math is simple: oil weight × rate ÷ 100 = grams. Purely as an illustration of the arithmetic, a supplier rate of 2% on 1,000 g of oils would be 1,000 × 2 ÷ 100 = 20 g. Use your own supplier's number, not that one.
Weigh everything. A lye calculator only works if the numbers you weigh match the numbers it gave you. Set the container on the scale, zero it, then add the ingredient. Go slowly on the last few grams, and if you overshoot, don't scoop back out and guess. I learned this the hard way, and I'll tell you about it in the troubleshooting section.
Making the Batch, Step by Step
1. Set up. Clear the counter, put on your gear, lay out your tools and line the mold if it needs it. Keep paper towels within reach.
2. Weigh. Weigh the water and the lye into separate containers, using the amounts from the calculator. Weigh the oils into their own pot. Solid oils like coconut and shea can be weighed straight into the pot you'll melt them in.
3. Mix the lye solution. Slowly add the lye to the water, stirring gently with a silicone spatula until it's clear. Expect a burst of fumes and heat at first. Step back, look away from the container and let it settle. Then set it somewhere safe to cool.
4. Melt the oils. Heat the coconut oil and shea butter gently until they're liquid, then add the olive oil, which will help cool them down.
5. Get the temperatures right. Aim for both the lye solution and the oils to land around 100-110°F. They don't need to match, and a 10-20°F gap is fine. If the lye solution is still hot, wait. If your oils cooled and started to go cloudy, warm them gently. Don't hold out for a perfect match, or you'll be waiting all afternoon.
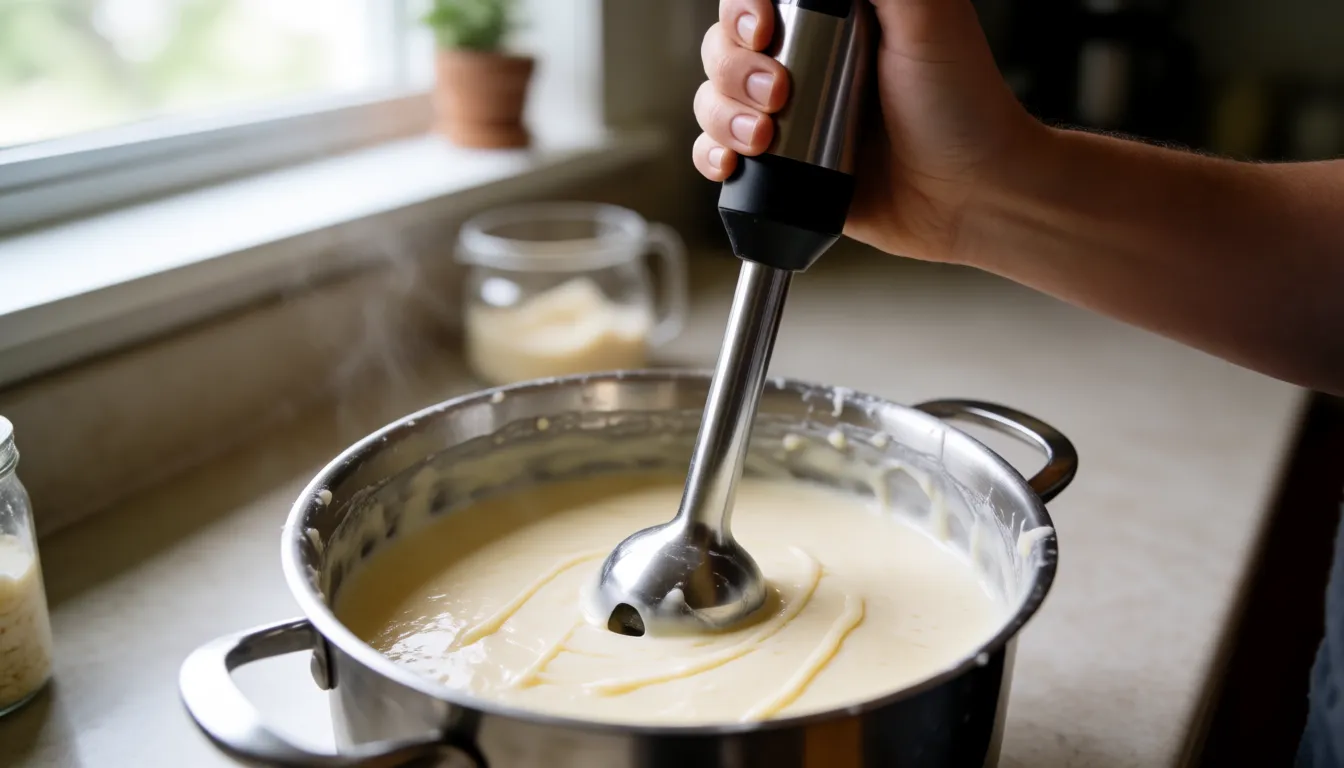
6. Combine. Pour the lye solution into the oils. Point the stick blender at the bottom of the pot before you turn it on so it doesn't spatter. Blend in short bursts of a few seconds, stir with the blender's foot, then stop and stir with the spatula. Repeat.
7. Recognize trace. Trace is when the batter has emulsified and stays that way. Light trace looks like thin custard. Drizzle some batter across the surface, and it leaves a faint trail that quickly sinks back in. Medium trace is like pudding, where the trail sits on top. For a first batch, stop at light trace, especially if you're adding fragrance.
8. Add fragrance. Stir it in by hand at light trace, and don't blend it in. Some fragrances speed up thickening a lot.
My first scented batch thickened so fast that by the time I'd scraped the fragrance out of its little cup, the batter had gone from custard to mashed potatoes. I plopped it into the mold in clumps and smoothed it as best I could. It made perfectly good soap with an unfortunate top. If yours starts to thicken, stop stirring and pour right away. Next time, add the scent at a thinner trace and stir just until it's mixed.
Why a stick blender? Stirring by hand can take an hour or more to reach trace. A hand mixer flings lye batter around your kitchen and isn't meant for this. The stick blender gets you there in minutes, and the batter stays in the pot.
9. Pour. Scrape the pot, tap the mold on the counter to release air bubbles, and move on to the next step.
Mold, Insulation and Gel
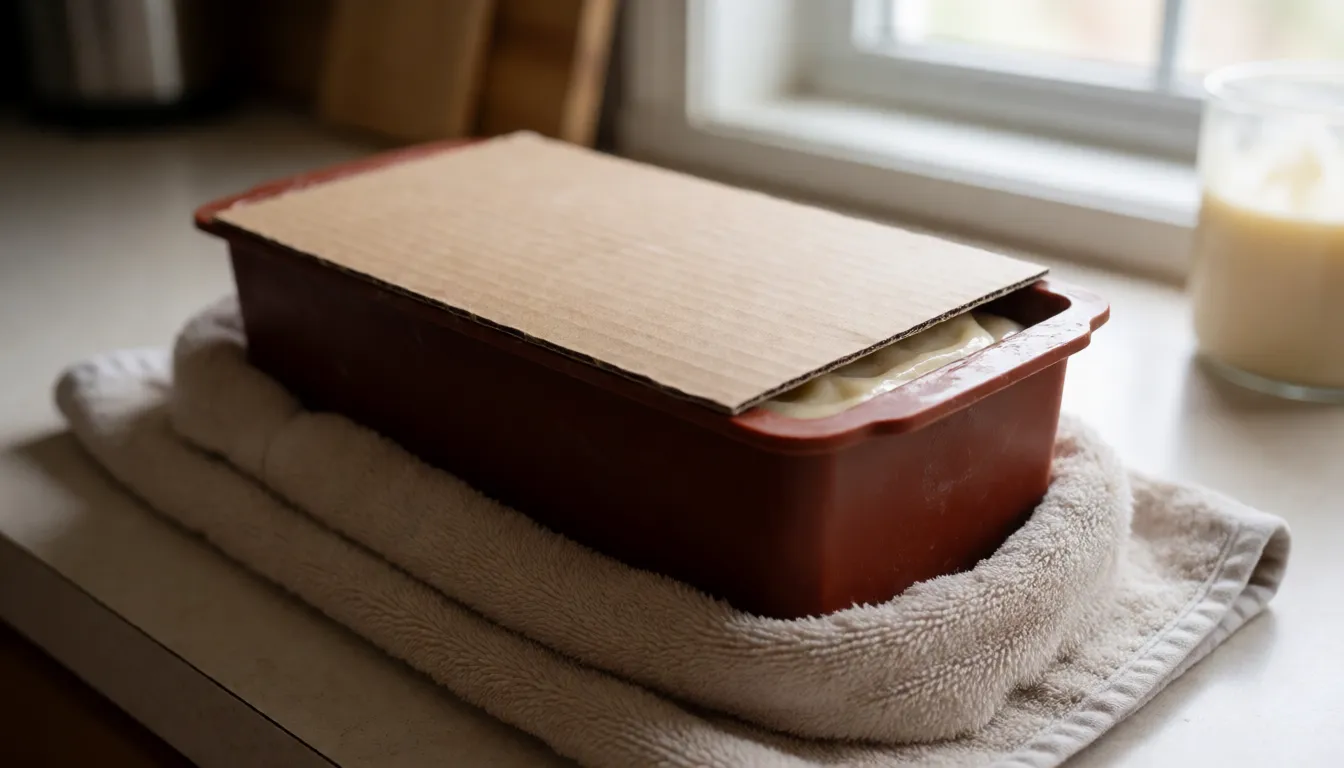
Cover the mold, then wrap it in a towel or blanket so the loaf stays warm. The batter makes its own heat, and that warmth carries it through gel phase, when the soap turns translucent and glossy for a few hours before it cools. A full gel usually gives brighter colors and a smoother bar.
What you want to avoid is partial gel in a loaf, where the center gels and the edges don't. It leaves a darker ring or patches. It's only cosmetic, and I'll cover it in the troubleshooting table below. Insulating the whole mold evenly helps prevent it.
If you'd rather skip gel entirely, put the covered mold in the refrigerator for the first day. That prevents gel. Some makers prefer it, but it isn't a better result across the board.
Unmolding and cutting. Leave the loaf for 24-48 hours, until it's firm enough to cut cleanly. If you press a fingertip against it and it feels soft or leaves a dent, wait another day. Then slide the loaf out and cut it into bars. Put on gloves if the surface still feels oily or tacky, since it may not have finished saponifying.
Curing Your Bars
Stack the bars on a rack or a baking sheet with space around each one so air can move through, and leave them for 4-6 weeks. During cure, water slowly leaves the bars, which makes them harder and milder and helps them last longer in the shower. Turn them every week or so to dry them evenly.
You can use a bar sooner if you can't wait, and it will still wash. It will just be softer and wear down faster. When a bar feels firm all the way through and doesn't dent under your thumbnail, it's ready.
When Things Go Wrong
Most first-batch problems have simple causes. Here's a quick guide.
| Problem | Likely cause | What to do with this batch | Next time |
|---|---|---|---|
| Seizing or very fast thickening | Usually the fragrance, sometimes a batter that was already thick or oils that were too cool | Pour or spoon it into the mold right away and press it down. It's usually still fine soap | Add fragrance at a thinner trace, stir by hand, and check the fragrance's notes from your supplier |
| Soft or crumbly bars | A weighing slip, a wrong recipe or oils mismatched with the calculator's numbers | Give soft bars extra time in the mold and cure. Crumbly or greasy bars may not be worth keeping | Re-weigh carefully, and enter your exact oil weights in the calculator |
| Sweating (beads on the surface) | Humid air pulling moisture to the bar, or glycerin surfacing | Pat dry with a towel and move the bars somewhere drier with good airflow | Cure in a drier, better-ventilated spot |
| Partial gel (dark ring or patches) | Uneven insulation or a cool room | The soap is fine, just a little patchy. Use it as is | Insulate the whole mold evenly, or refrigerate to skip gel |
My soft-bar story. On one early batch I was pouring the last of the olive oil and overshot my target slightly. Not wanting to waste it, I left it in and didn't rerun the calculator. Six weeks later the bars were still soft in the middle and left a slick film in the dish. It was a weighing slip, and the fix was to weigh again. If you overshoot, either scoop back to the exact weight or re-enter the real weight in the calculator before you mix.
For deeper troubleshooting, the soap problems guide covers seizing, soft bars and partial gel.
Your Next Batches
Once you've cut and cured your first bars, here's where to go from here:
- Add colorants or additives. Start small and change one thing per batch so you know what caused what.
- Try a swirl. Split the batter, tint one half and pour in layers, then drag a spatula through for a simple swirl. It works best at light trace, before the batter thickens.
- Scale up. Keep the same percentages and change the weights, then run the new total through the lye calculator again. Never scale lye and water by hand.
For more ideas, browse the cold process soap recipes, or try the beginner trinity bar recipe for another simple starter. If you want a second walk-through with photos, The Nerdy Farm Wife's cold process guide is a good one to read alongside this.
More from the blog
- What Is Saponification? How Oil and Lye Become Soap
- How to Make Liquid Soap: KOH Paste, Dilution, Fixes
- How to Make Breastmilk Soap: Melt and Pour or Cold Process
- Essential Oils for Soap Making: Rates, Picks and Fixes
- Soap pH: What's Normal, Why It's Alkaline, How to Test
- Master Batching Soap: 1:1 Lye Solution and Oil Blends
- All posts →